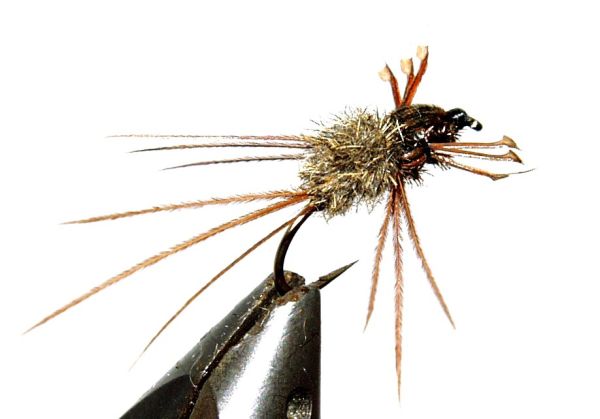
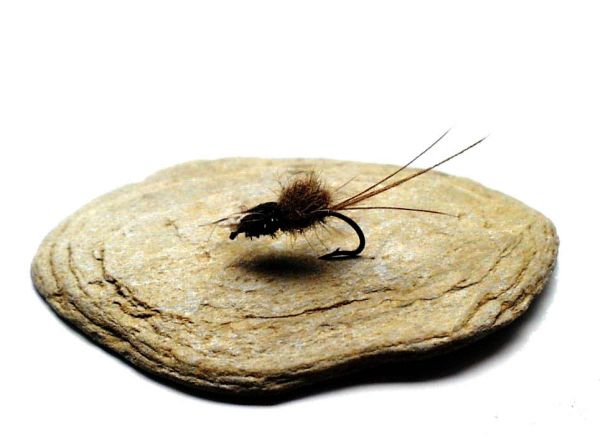
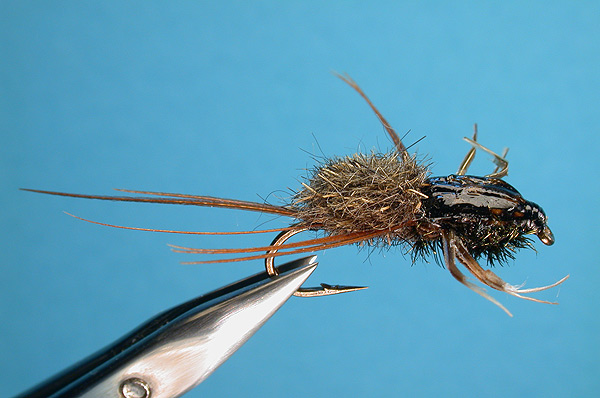
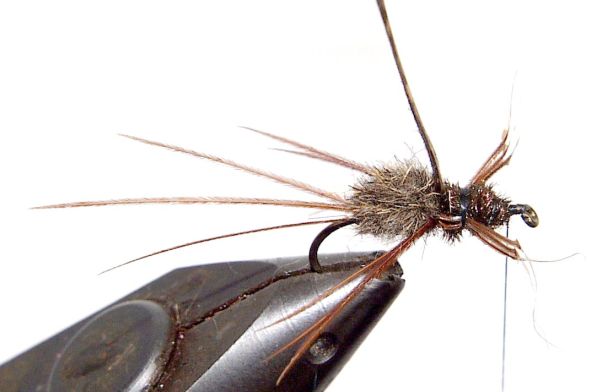
Creedon's Creeper
Tying instructions:
Step by step photographs - John Morton
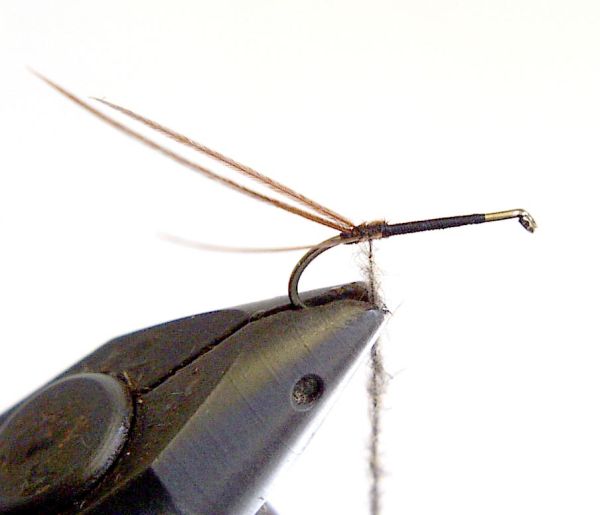
Place hook in the vice, holding the hook at its bend in the vice jaws and the point covered by the jaws.
*** The Underwrap ***
Starting two eye lengths back from the eye of the hook, lay down a close wound bed of tying thread along the whole length of the hook; to a point halfway between the hook point and the hook barb. At this point lay about four wraps of thread, each one over the other to form a small noodle or hump. This will be used to help spread the tails when they are tied in.
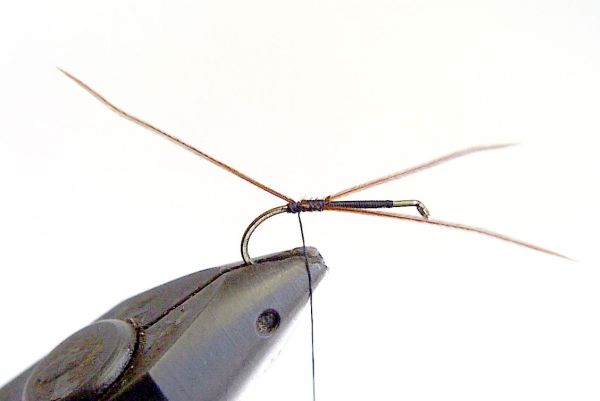
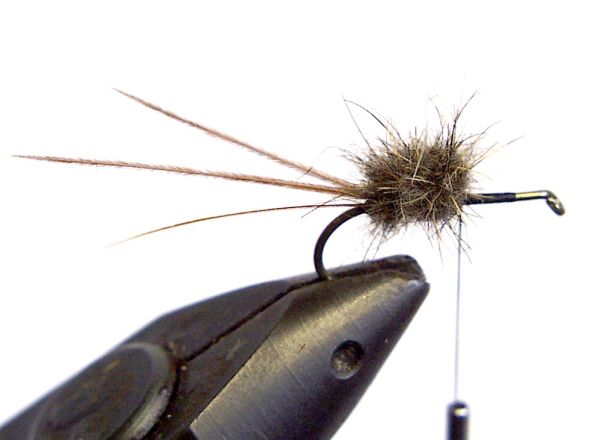
*** The Tail ***
This pattern employs a different technique inasmuch that apart from the tail the whole fly is tied from the middle. At the rear of the hook and over the bed of thread you have just wound, make a small compact set of wraps to form a small lump. This lump can also be achieved by dubbing a very fine noodle of fine hair such as rabbit underbody fur, (4-5 wraps). Take three spicules from the center tail feather of a Ringneck Cock pheasant, and tie them onto the top of the hook with the point’s rearward and extending two hook lengths beyond the `lump'. Bend the two outside spicules to face forward (toward the hook eye) and wrap over them toward the hook eye for three millimeters. Bend them backward again to extend again as tails. They will now be about a third shorter than the center spicule. Carefully positioning these now shorter spicules, tie them back by winding your thread into the thread or dubbed lump, until the two short side spicules are forced to a position of 45 degrees from the shank and lying alongside the hook shank. The longer center tail spicule cocks itself upward and all the spicules sit well splayed. This technique can be used on hackleless flies such as "paraduns" to enable them to float in the surface film without their tails sinking.
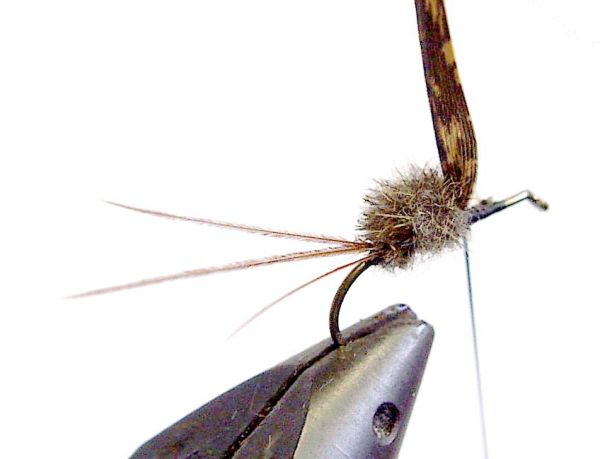
*** The Abdomen ***
Using well-blended fur from a Hare’s mask, place a light dubbing from the tail to the center of the hook. This forms an underbody and covers the thread base wrap so it can't be seen. Dub a tightly wrapped length of hares mask fur, to about 100-mm long, on the thread and slide this dubbed fur strip up the thread until it just touches the hook. Hold the dubbed thread and the bobbin pulled toward your body at a right angle from the hook. Take a dubbing needle in the left hand, and place it's point in the exact center of the dubbed fur. Make a fold in the dubbed thread, to double the 100 mm. length of fur dubbing, by taking the bobbin over the top of the dubbing needle, back toward the hook. This will return your thread to a position at the hook center, and ready to take exactly two turns of bare thread around the middle of the hook as close to the folded thread and fur loop as possible, but without binding down over the thread loop.
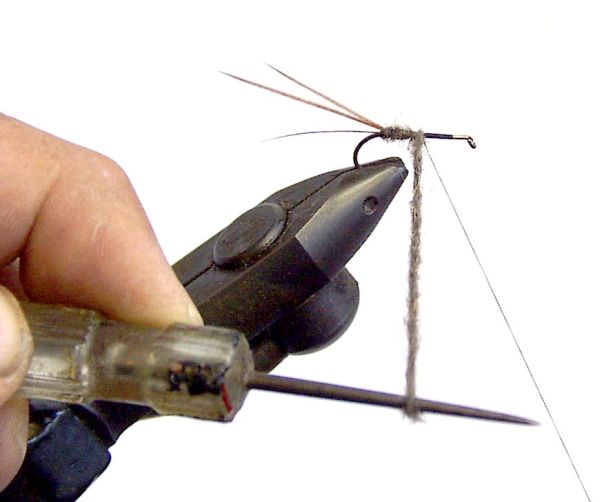
The bobbin should now be held directly under the hook, and with a steady downward pull, the tube of fur is concertinered on to the top of the hook. Care is needed at this point to see that the fur ball that is developing does not roll over and under the hook. This is done by keeping the left hand holding the dubbing needle in a direct line of pull towards your body releasing it's position slowly toward the hook as the downward pressure of the bobbin snugs up the fur loop. This loop must be kept as tight as possible all through this maneuver. Only at the last moment when all the fur has drawn up tight into a small ball, does the left hand lift the point of the dubbing needle over and onto the top of the hook. Release it from holding the fur loop and give a final downward pulling of the bobbin to snug last of the loop down tight against the top of the hook.
Take two locking turns of thread over the hook and to the rear of the fur ball and then position the thread over the tail, about a millimeter in front of the lump that separates the tails. Repeat the loop of fur and the "pull down technique" as previously described. This will now leave two balls of fur on top of the hook and a very small space between them. The thread should be brought to a position to lie exactly between these two fur balls.
Now dub a further 150mm length of thread and carefully put this last larger ball of fur in the exact center point of the fly between the two smaller balls. Hold the three balls together as one on top of the hook, using the right hand. Wind three tight winds horizontally around the base of all of balls to gather them together as one. At this point, trim any discrepancies and tease the fur until a rounded buggy abdomen is produced that sits right on top of the hook. This completes the abdomen and tail of the Creedon's Creeper. The thread should now lie in front of the abdomen ready for the next section.
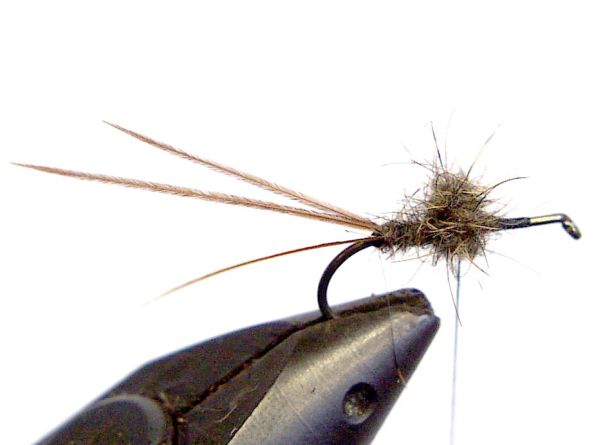
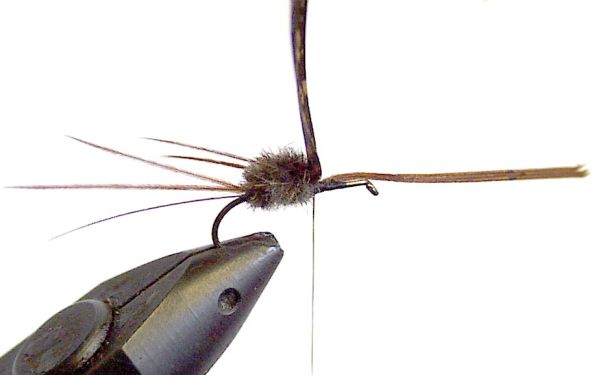
*** Wing Cases ***
***** Strip a 6mm length of feather section from a hen pheasant tail, or a barred brown turkey tail. With the tips facing forward toward the hook eye, tie the tips on to the hook and bind rearward to take the thread and the pheasant section of wing case hard against the abdomen fur ball. Snip off any waste tips as close to the thread as possible. This wing case slip is now left till later. The wing cases when `pulled over' and fastened at the hook eye will be the last move to complete the fly. Some tiers prefer the wing cases to be made from a section of Kea feather. Without doubt this seems to produce a more effective fly, but at the cost of a rare bird's life. It is preferable that endangered species are protected by not using them as an ingredient in a trout fly.
The original fly had `legs' made by selecting three spicules from a cock pheasant center tail. Pull these sharply from the center spine of the feather. This leaves curly bits at the butt ends that look very lifelike as insect `clawed' feet. I much prefer this to the Kea feather so commonly used. Tie these three spicules with the tips facing rearward and to a length equal to half the length of the tail. This first set of three legs is tied against the side of the hook facing away from the tier. It is positioned with the right hand, and then locked in place with the left-hand forefinger and tied in tightly.
*****The remaining feather with the claw like tips that is facing forward is far too long now for the finished fly. Fold these tips backward so that the `claws' lie in a position level with the rear of the abdomen. This point is level with the rear of the abdomen fur ball. Put in a few extra tight turns to bind them in place and snip off the remaining loop which is now facing forward. It is of no value now in the fly’s construction. Both the front and back legs face rearward and are out of the tiers way

Repeat the same moves for the hook side facing you, and attach the second set of legs. It pays to make a careful check that the tips of the `claws' on this second set of near side of the hook legs are tied exactly level with the far set. If not even, the finished fly will have one set of front legs longer than the other and spoil the look of the finished fly.
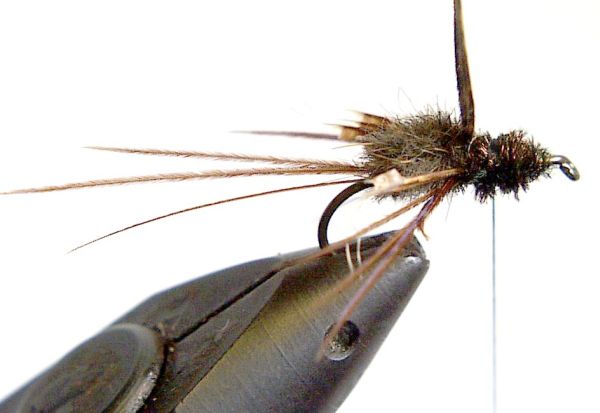
*** The Thorax. ***
Take three to four pieces of peacock herl (number depends on hook size) and tie them in by their butts at the center of the hook. The thread is left at this center position and as close as possible to the point where the legs protrude from the fly. Wind in the two peacock herls together to form a cigar shaped thorax, taking care not to place any material in the front three millimeters of the hook that is reserved for the head. The idea here is to build up a large ball shaped thorax.

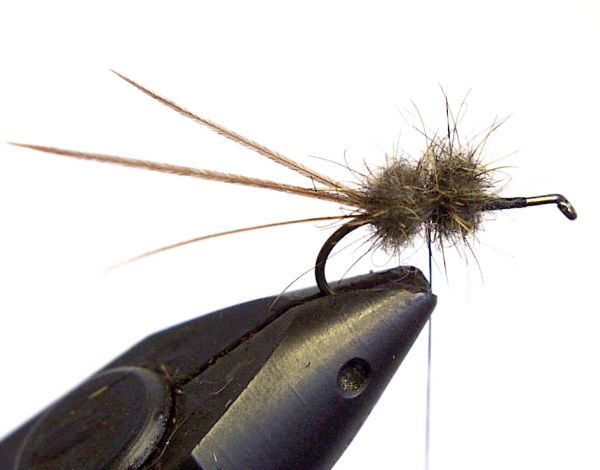
Tie off the peacock herls at the center of the hook, and snip off the waste. Carefully pull the far side `clawed front legs' forward and close against the peacock herl thorax, starting with the far set of legs. The tie down position of the legs is almost exactly 1mm forward of the position they were lying in prior to pulling them forward. Do the same with the set of legs on the near side of the hook. Using the thumb and forefinger of the left hand, hold the forward facing legs out of the way and carefully carry the thread in a loose spiral to the front of the hook making sure that you don’t `chase’ the peacock herl thorax forward into the head tie off section. Put two locking winds in, so that the thread lies against the front of the thorax and at the back of the three millimeter space left for the head of the fly.
**** Wing Case Alignment ****
Bring the wing cases over the top of the fly using he right hand for this operation. Keeps taughtly pulled over the hook eye, and hold just clear of lying on top of the hook. I find it useful to hold the wing cases with the eye of the Hook lying in the groove between my right index fingernail and the skin. This places the wing cases exactly in position for tying down. Use the left hand to swing the bobbin over the hook to tie down the wing cases and let the bobbin fall on the far side. Tighten the wind. Repeat this wind twice more. A point to watch is that the wing case whisks lie parallel with each other when tied down. And when pulling tight the first wind-down turn at the hook eye to tie off the wing case, Don’t allow the thread to pull the wing cases out of alignment by sliding off the top of the hook. To prevent this happening gently pull the right hand holding the wing roots bunch toward you and against the direction of pull of the tie-down thread. Secure the wing roots into the 3mm space at the eye of the hook that was reserved for this purpose. Cut off the excess material. Tie down the straggly bits until a smooth even head is built up. Whip finish and give the head a coat of clear cement. When this is set and dry, follow with two coats of black head lacquer allowing drying time between coats