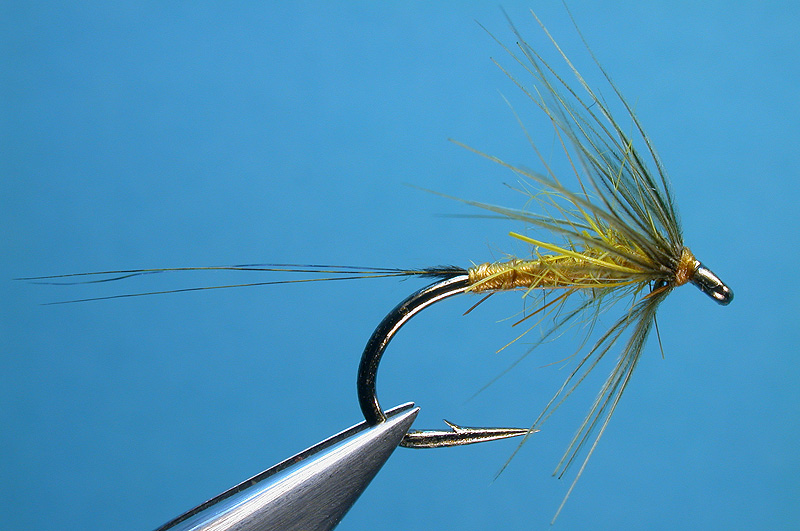
(The materials are listed in the order they are tied in. Instructions assume righthanded tier.)
Tying instructions:
- Attach silk and tie in hackle. Depending on how sparse or full you want the finished fly, strip away one side of the hackle (as shown) or leave intact.
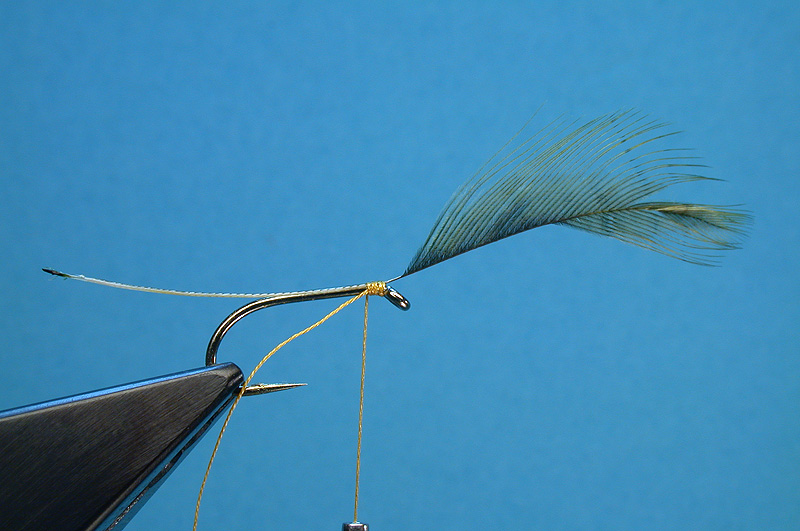
- As there will only be one layer of silk for the body, tie in the tail barbs shortly behind the eye.
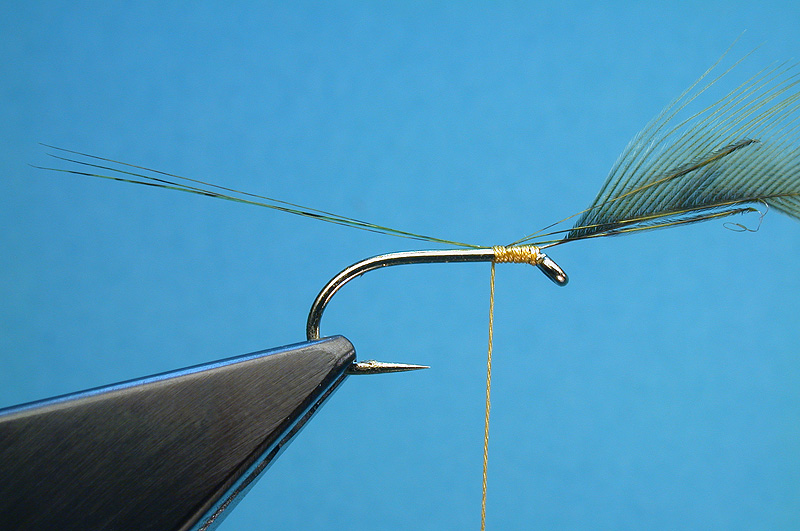
- Taking care to keep the tail barbs on top of the hook shank, run the silk to the bend in touching turns.
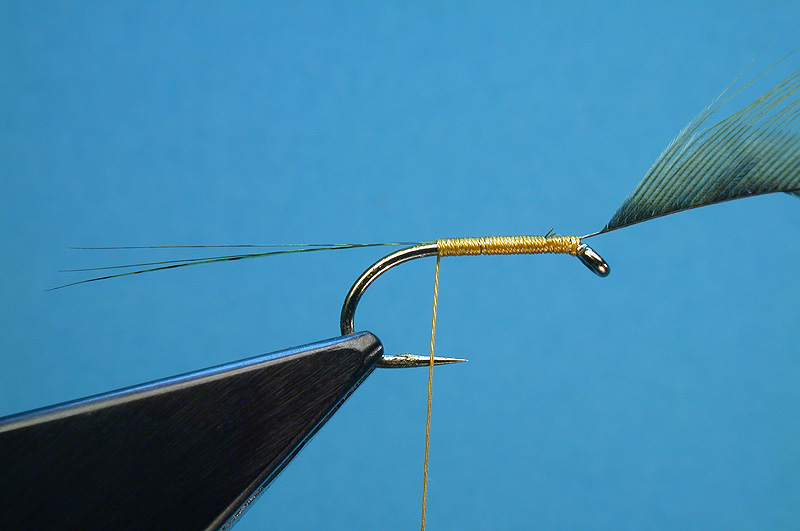
- Untwist the silk to flatten it, then split it with your dubbing needle. Open the 'loop' and insert a small amount of your dubbing material. In the Buttercup amber dyed Argentinean hare is used. This material has a wonderful blend of coarse and fine strands. Allow the 'loop' to close, the weight of the bobbin holder will keep the trapped dubbing strands in place.
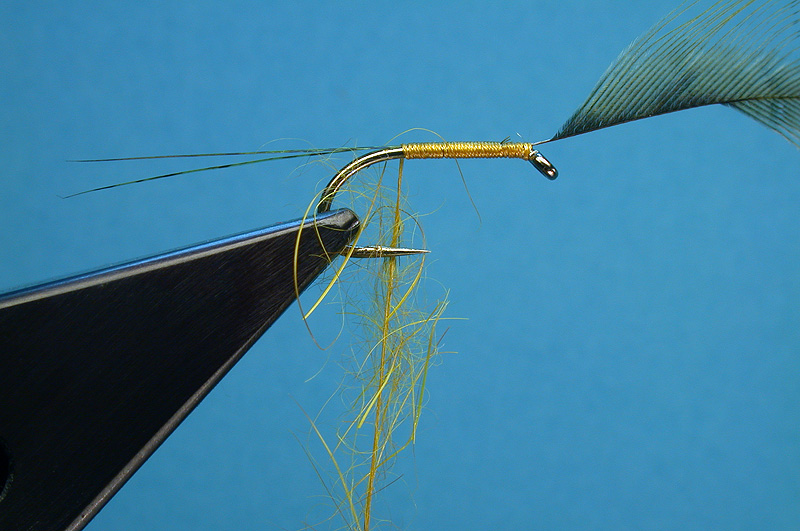
- Spin the bobbin holder to twist tight the silk, trapping the dubbing strands securely.
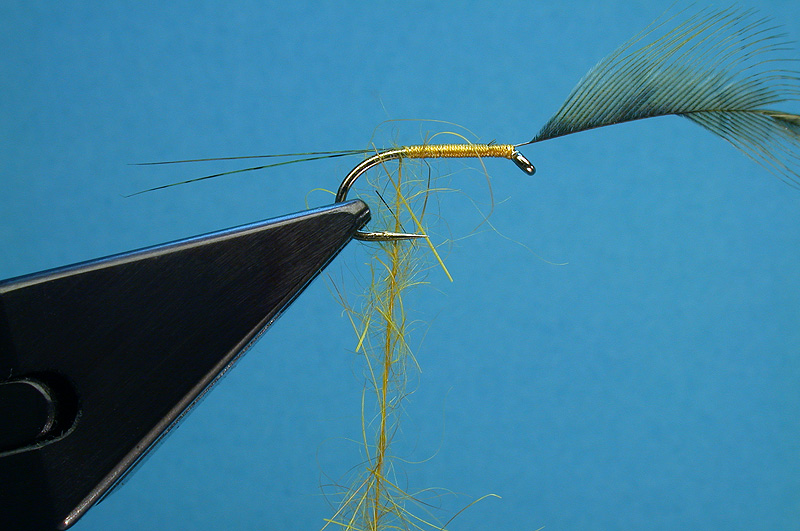
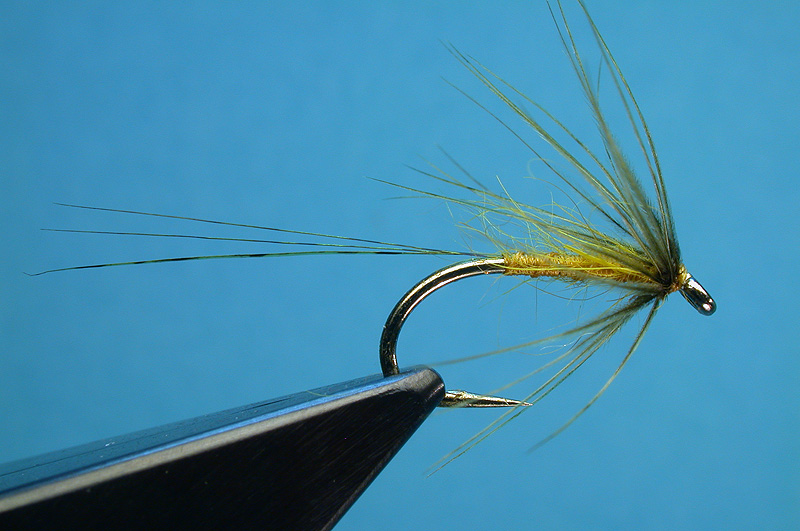
- Spiral the silk/dubbing in an open spiral 'rib' towards the eye. When you reach thorax section, move to touching turns to bulk up the body forming a slender but distinct thorax. Allow the silk to hang just left of the eye of the hook.
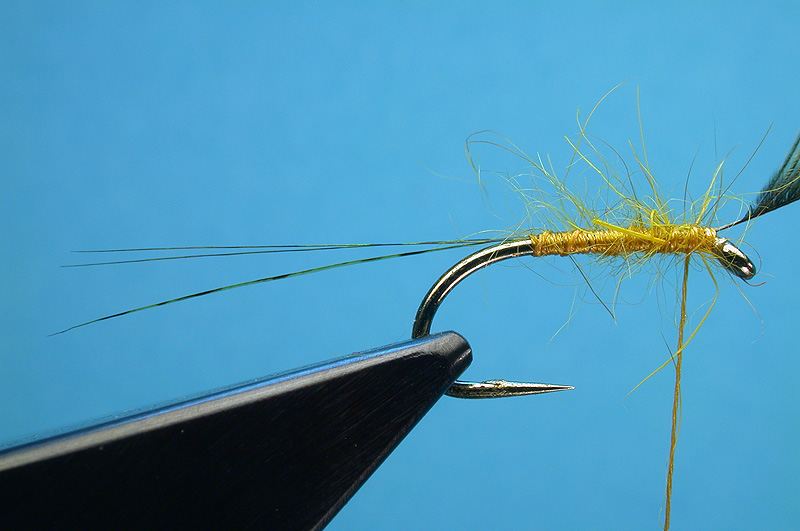
- Clip on hackle pliers (I like to use EZ-Pliers for these wingless wets) and make 2 or 3 turns of hackle, wrapping away from the eye. Trap the feather tip, and cut through the hackle with steep angle single turn ending up in front of the hackle. Snap away, or trim close, the feather tip.
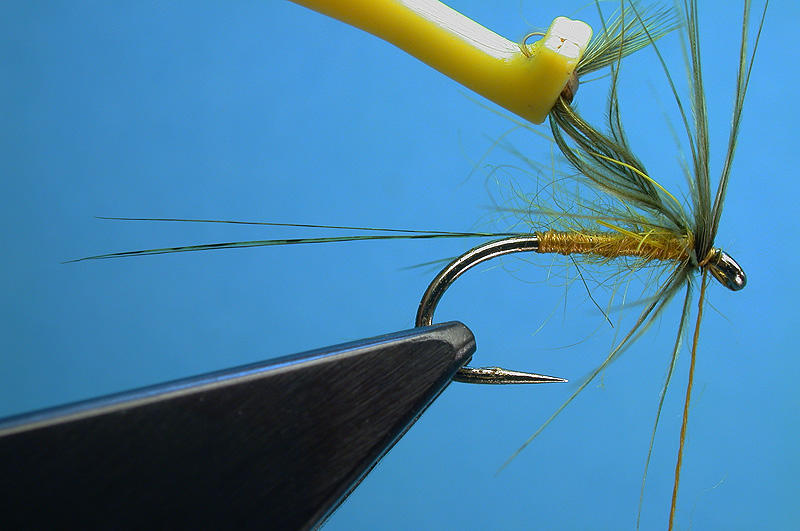
- Make a three turn whip finish to complete the fly. A small droplet of varnish adds the finishing touch. Done!
Comment:
The single layer silk body will acquire a wonderful translucence when wet, and the fuzzy rib spiraling back to the eye forms a delicate halo-like shroud which may add, I believe, an illusion-of-live positive trigger to these wingless wet patterns.
|
|
|
